
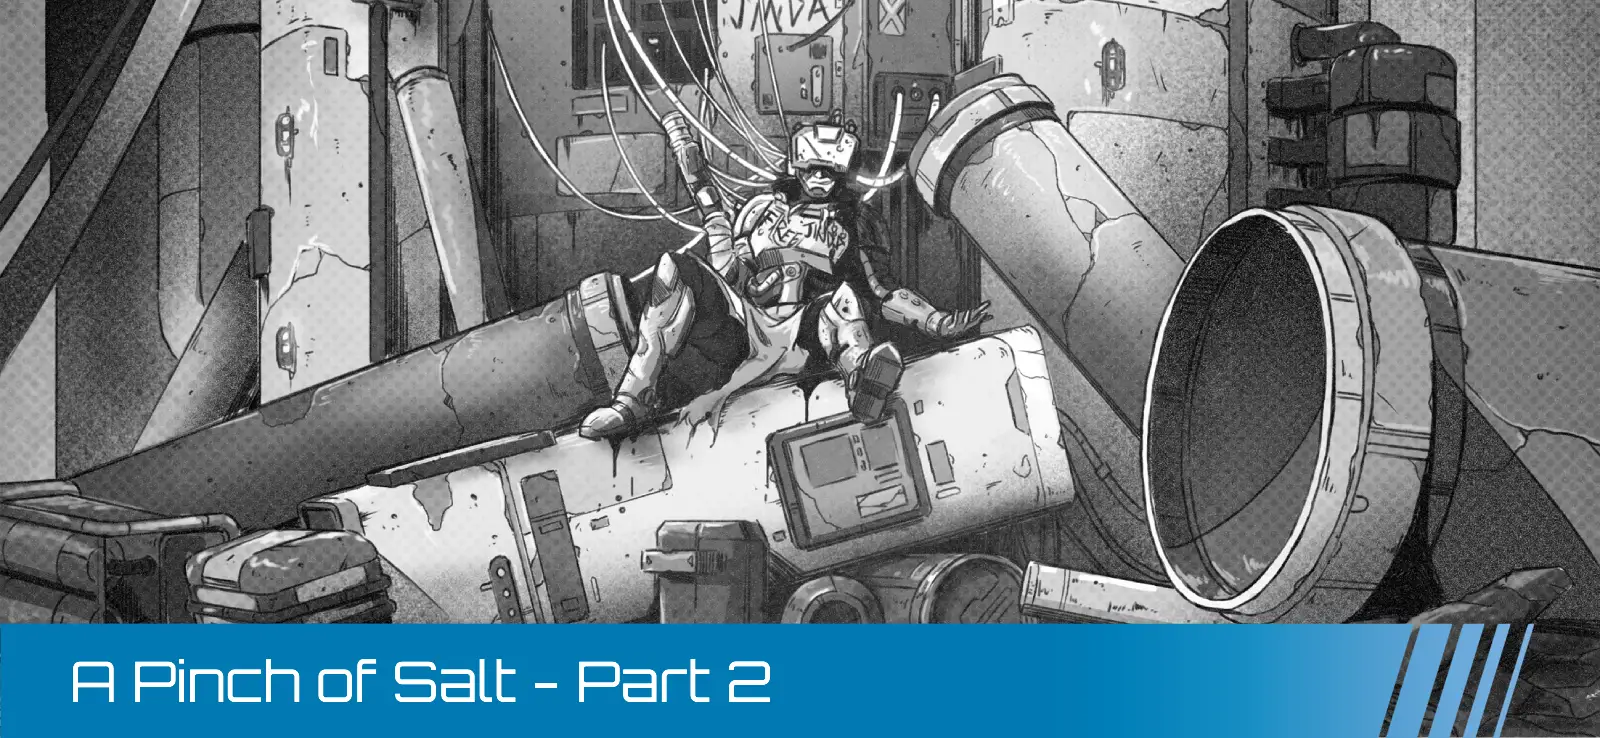
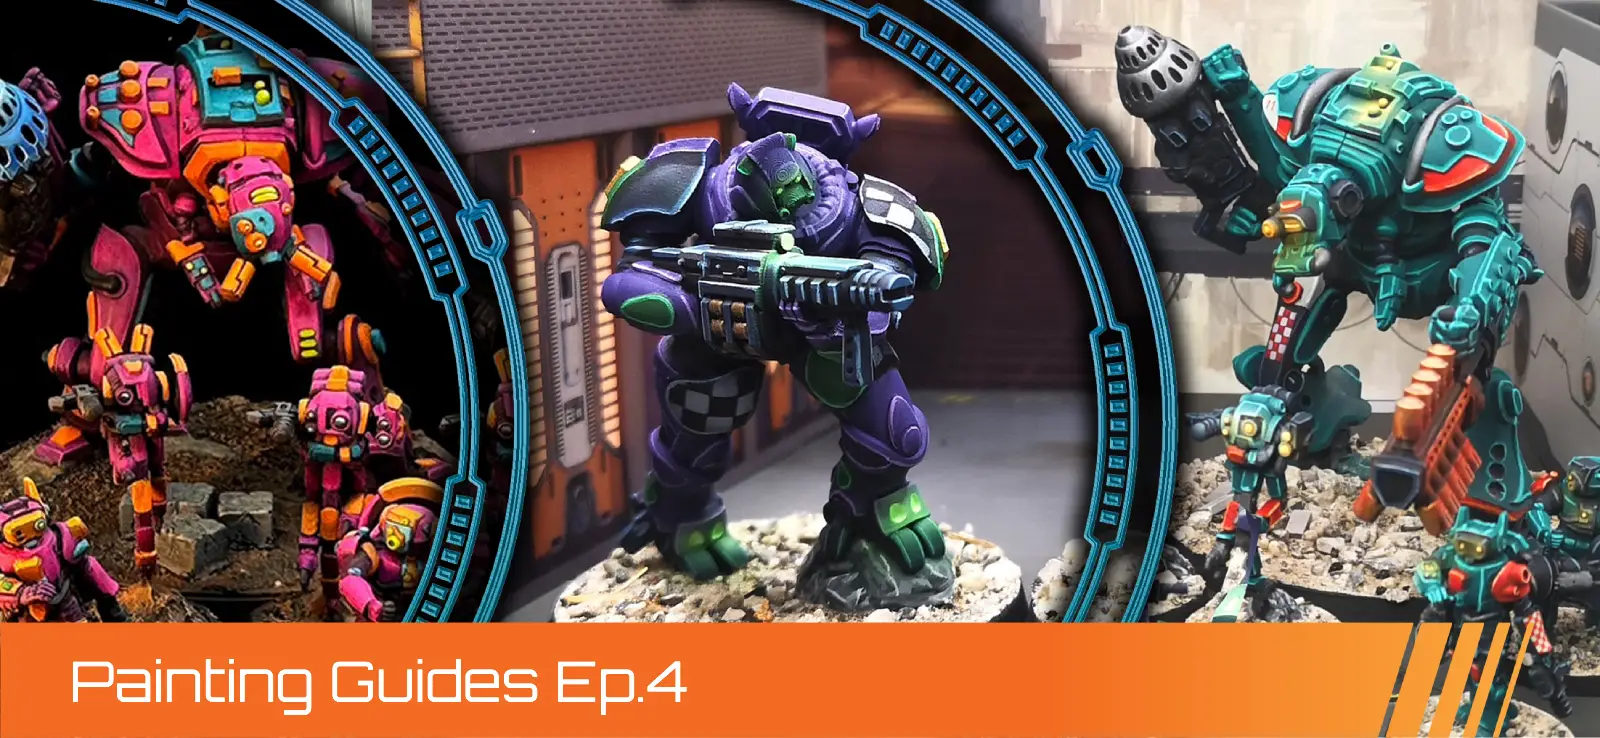
Guardcore Aggressor Support Group - Redshift Siege Artillery Color Scheme
By: Zoe Wright (Tankpot Paints)
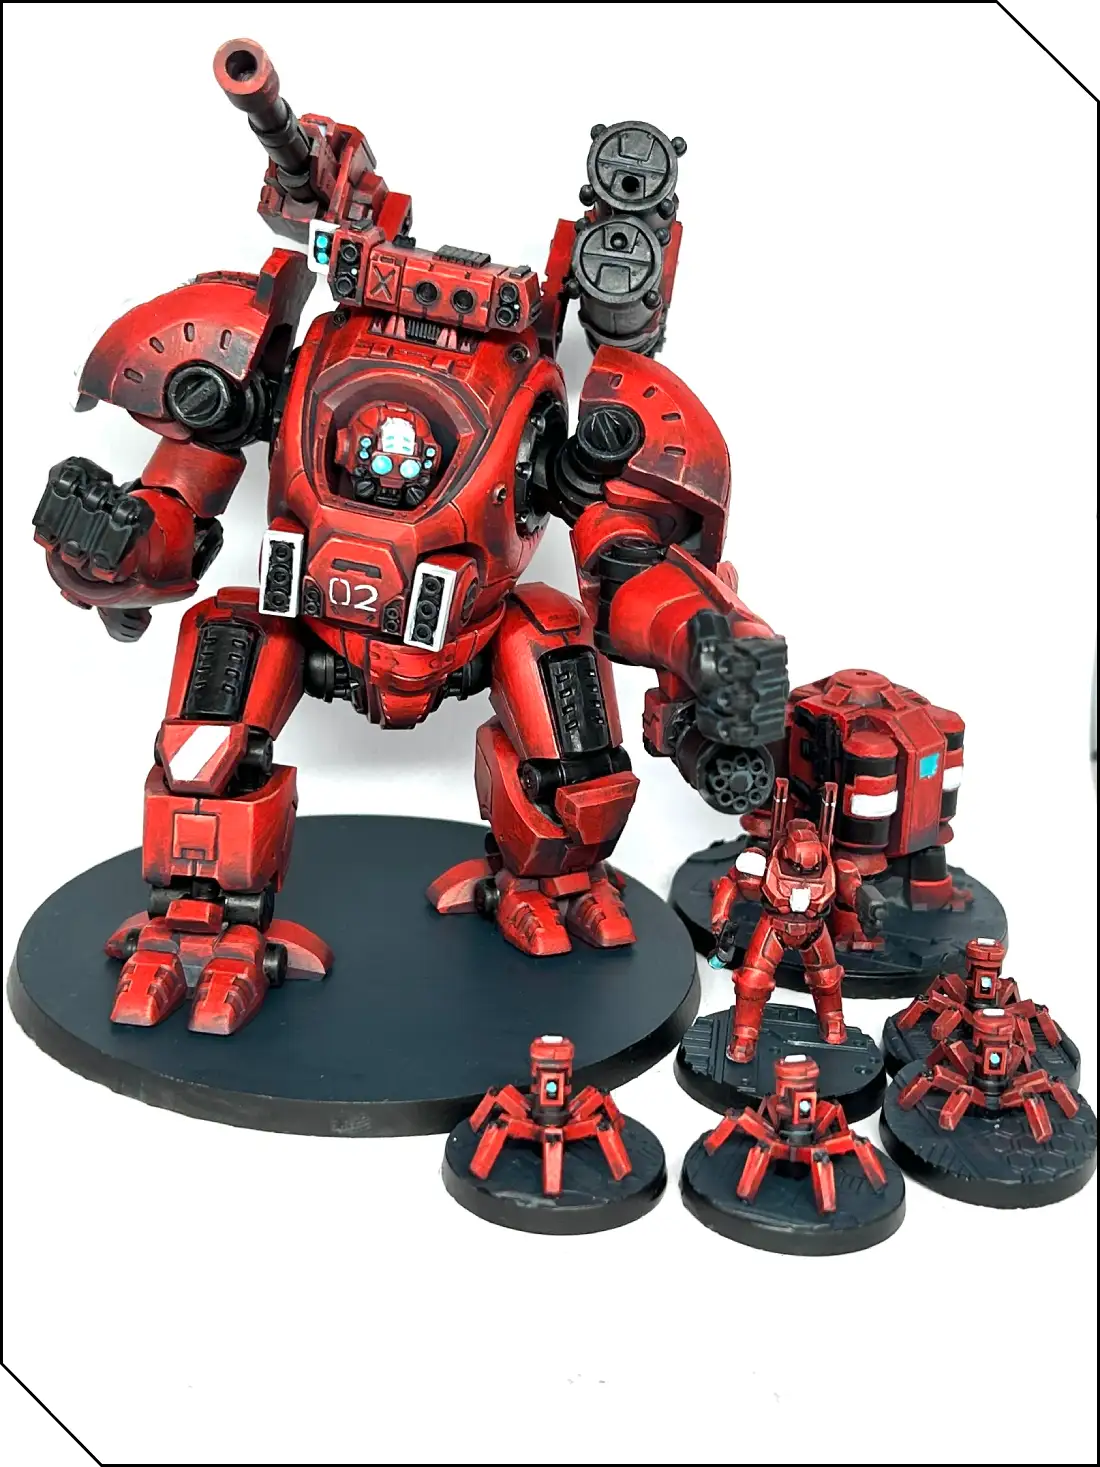
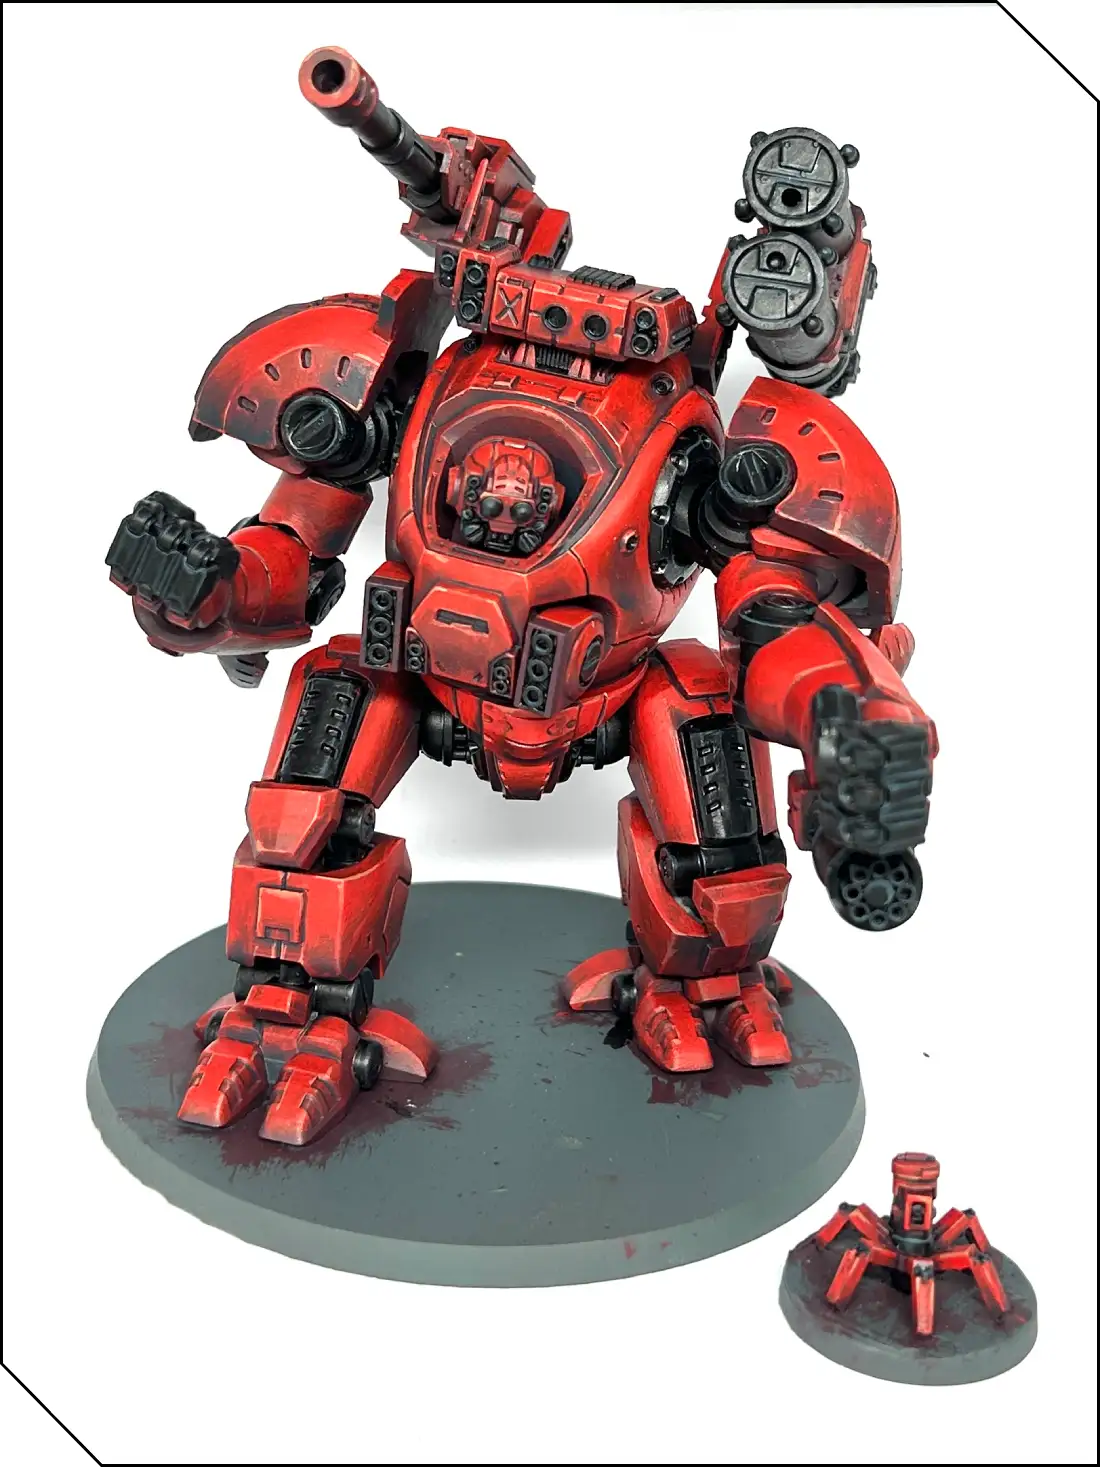
In this tutorial, I’m going to show you an easy way to paint an impactful red color using a handful of paints. It’s a very difficult color to get right as most red paints are quite thinly pigmented, and this is especially true when painting a large model. I’m going to demonstrate this on the Onslaught, as its large, curved panels will show off the techniques well.
I’m going to be using P3 paints for this, and while you can substitute paints from other ranges if that’s what you have, I find that P3 paints tend to have a consistency that makes blending the different steps together very easy. Nevertheless, if you don’t have them, don’t worry! This will still work so long as you’re careful.
Tools:
- Medium basecoat brush
- Layer brush
- Fine detail brush
- Water pot
- Paint palette
- HB/No.2 pencil
- Gray acrylic spray primer
Paints:
- P3 Sanguine Shadow
- P3 Khador Red
- P3 Khardic Flesh
- P3 Thamar Black
- P3 Coal Black
- P3 Underbelly Blue
- P3 Morrow White
- P3 Arcane Blue
First steps
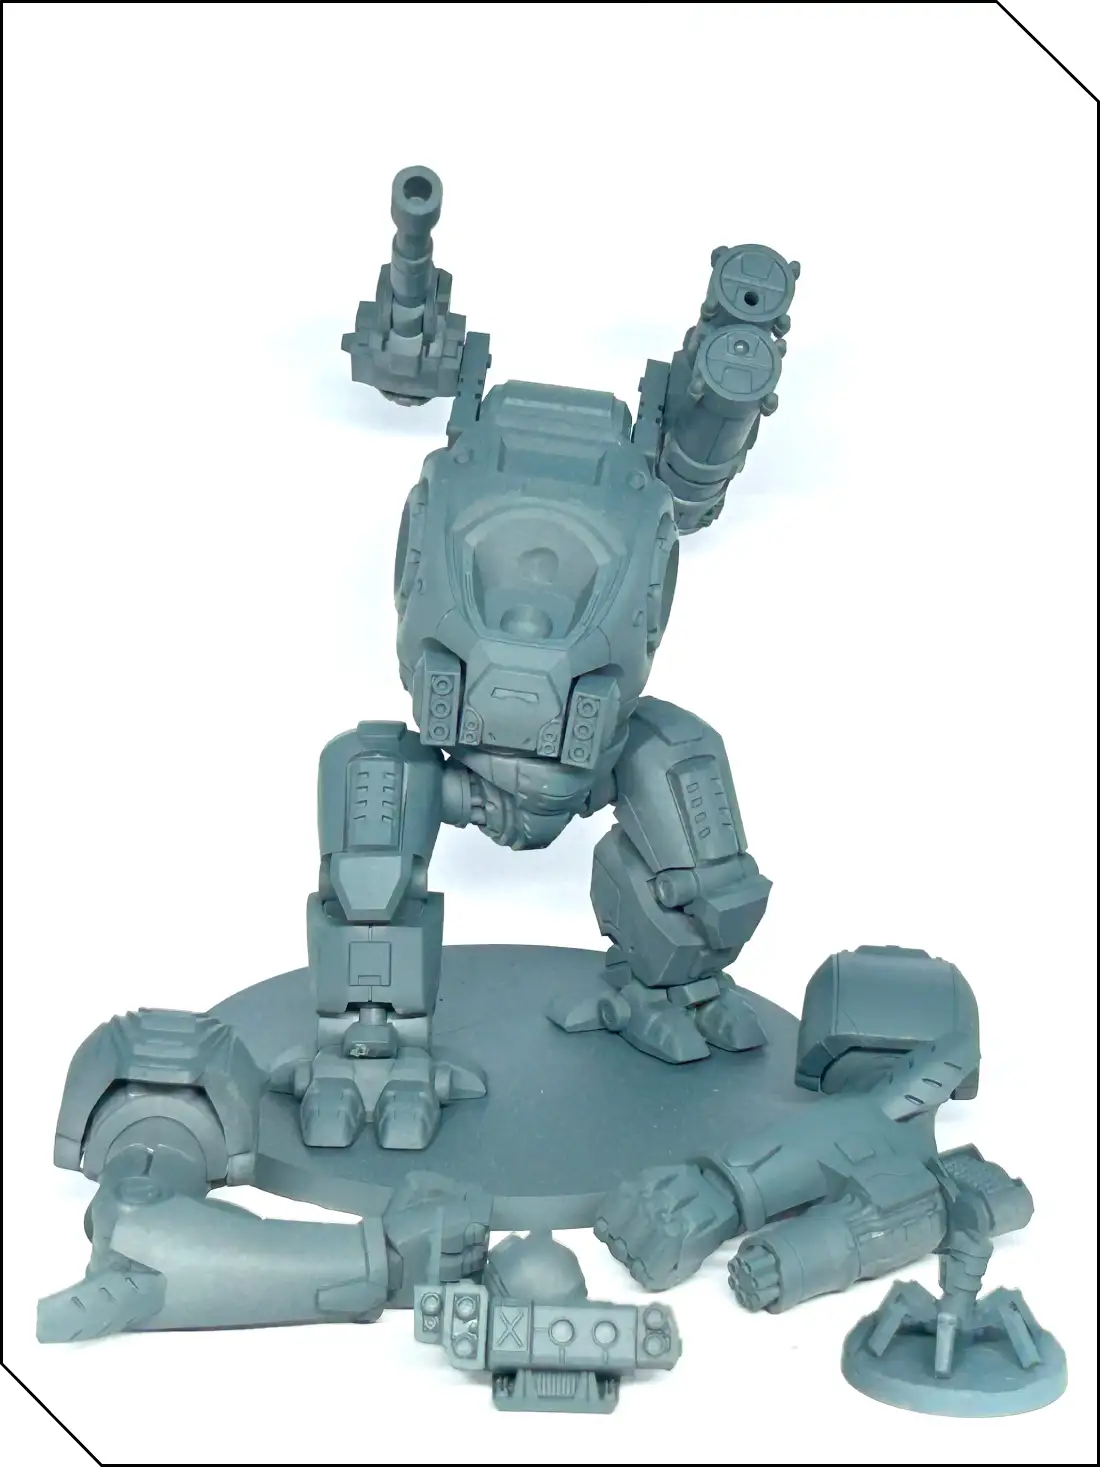
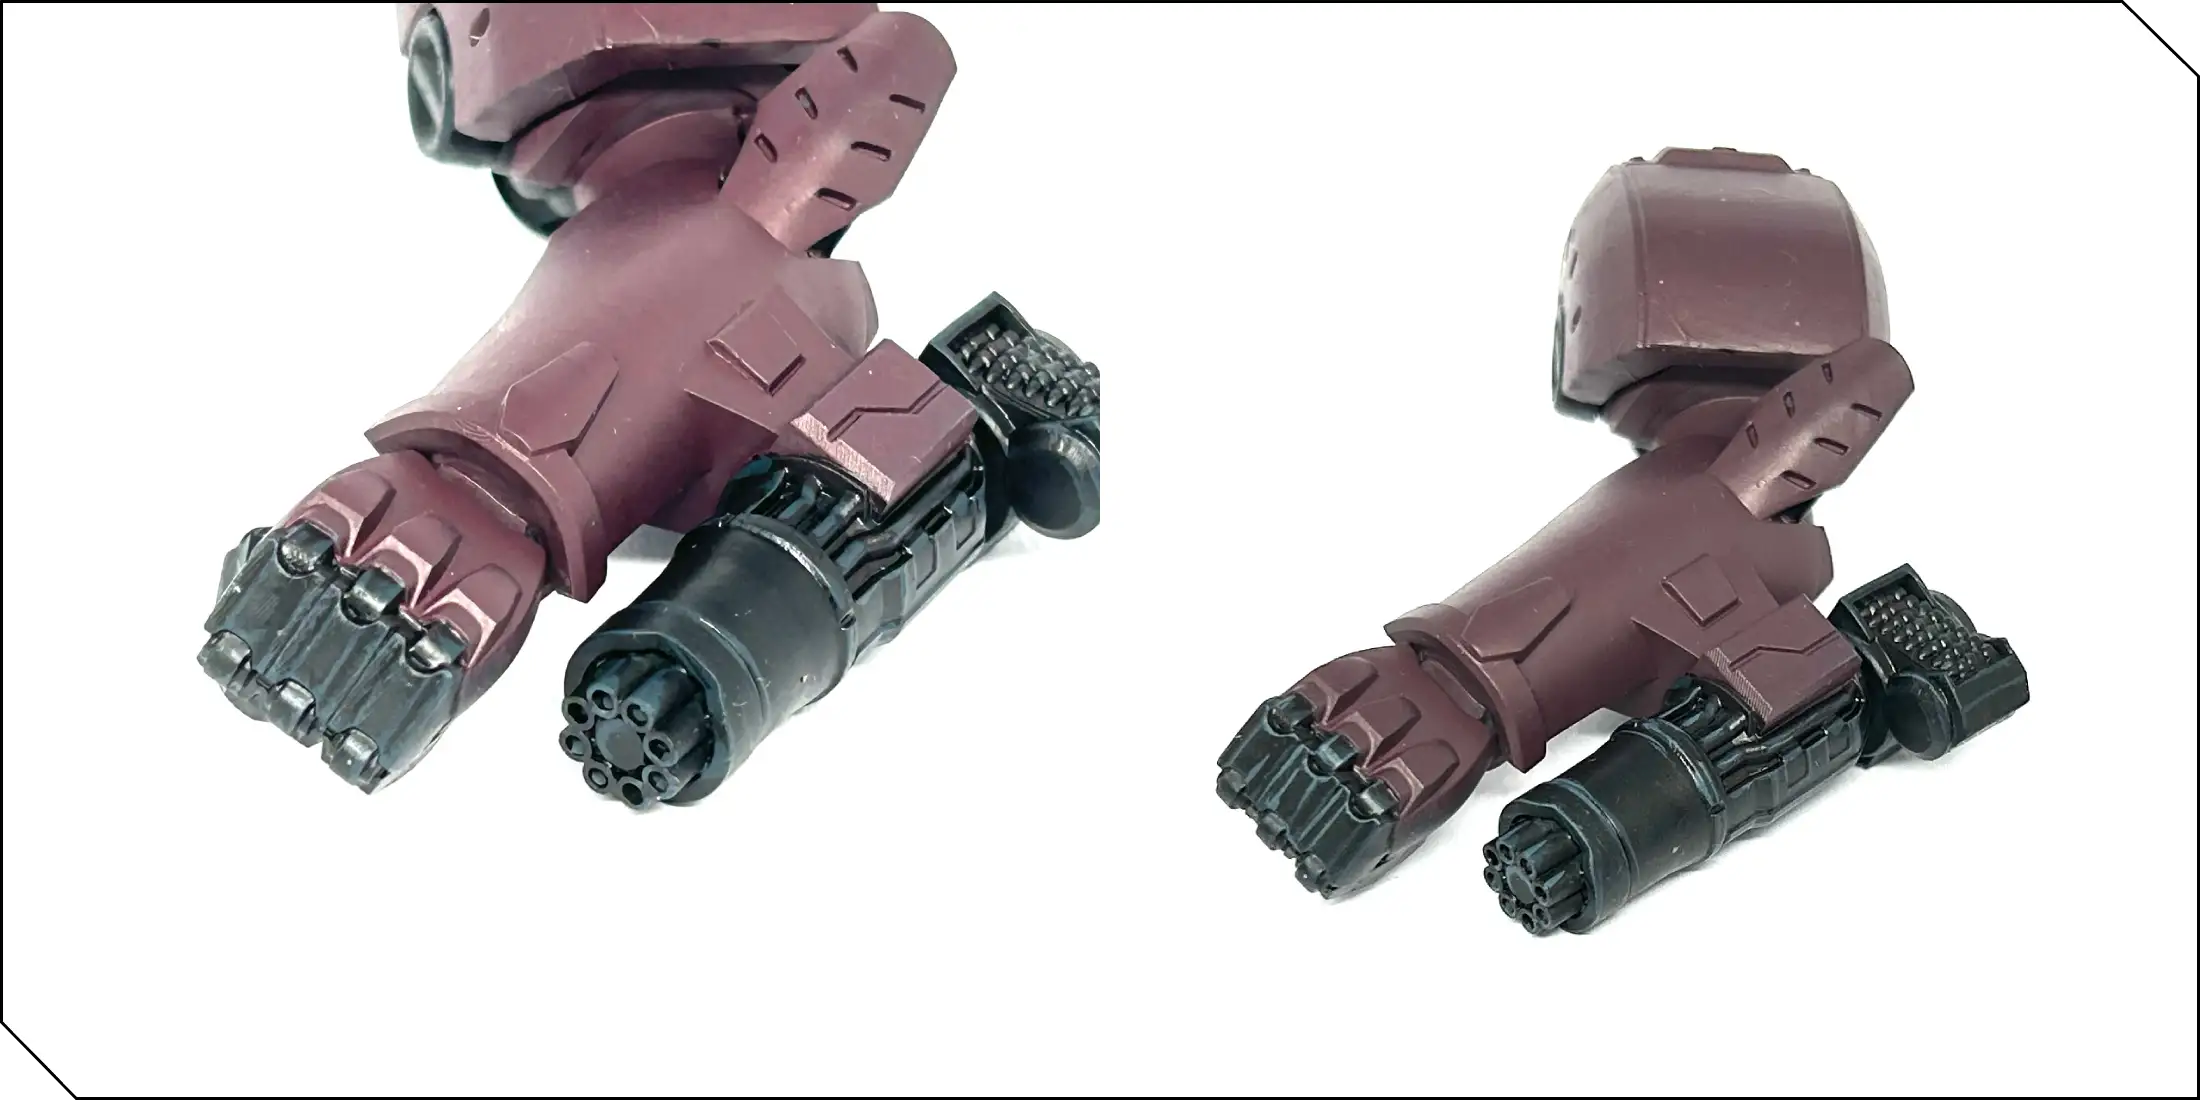
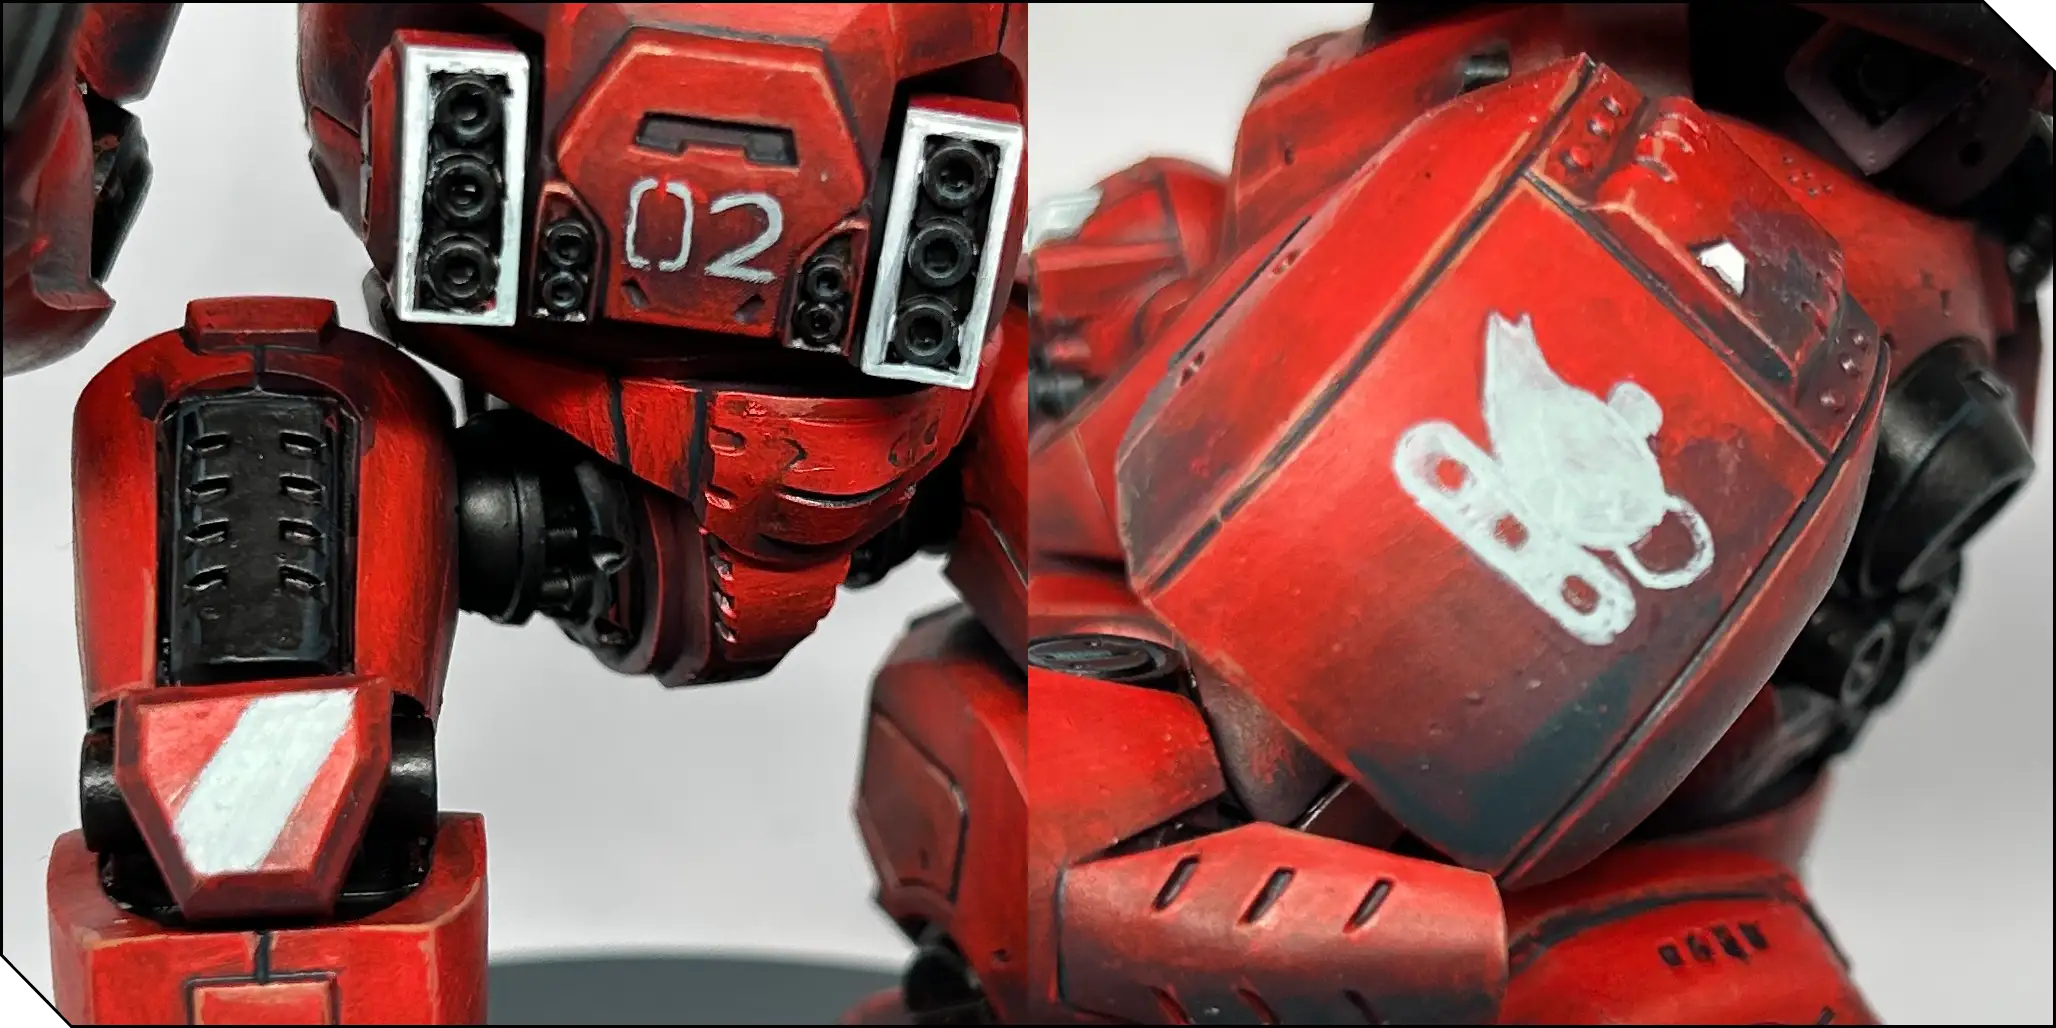
The first thing to do after assembly is to prime your model with gray spray primer. As you can see, I left the arms, head, and array off of the main body, which will make painting everything a lot easier.
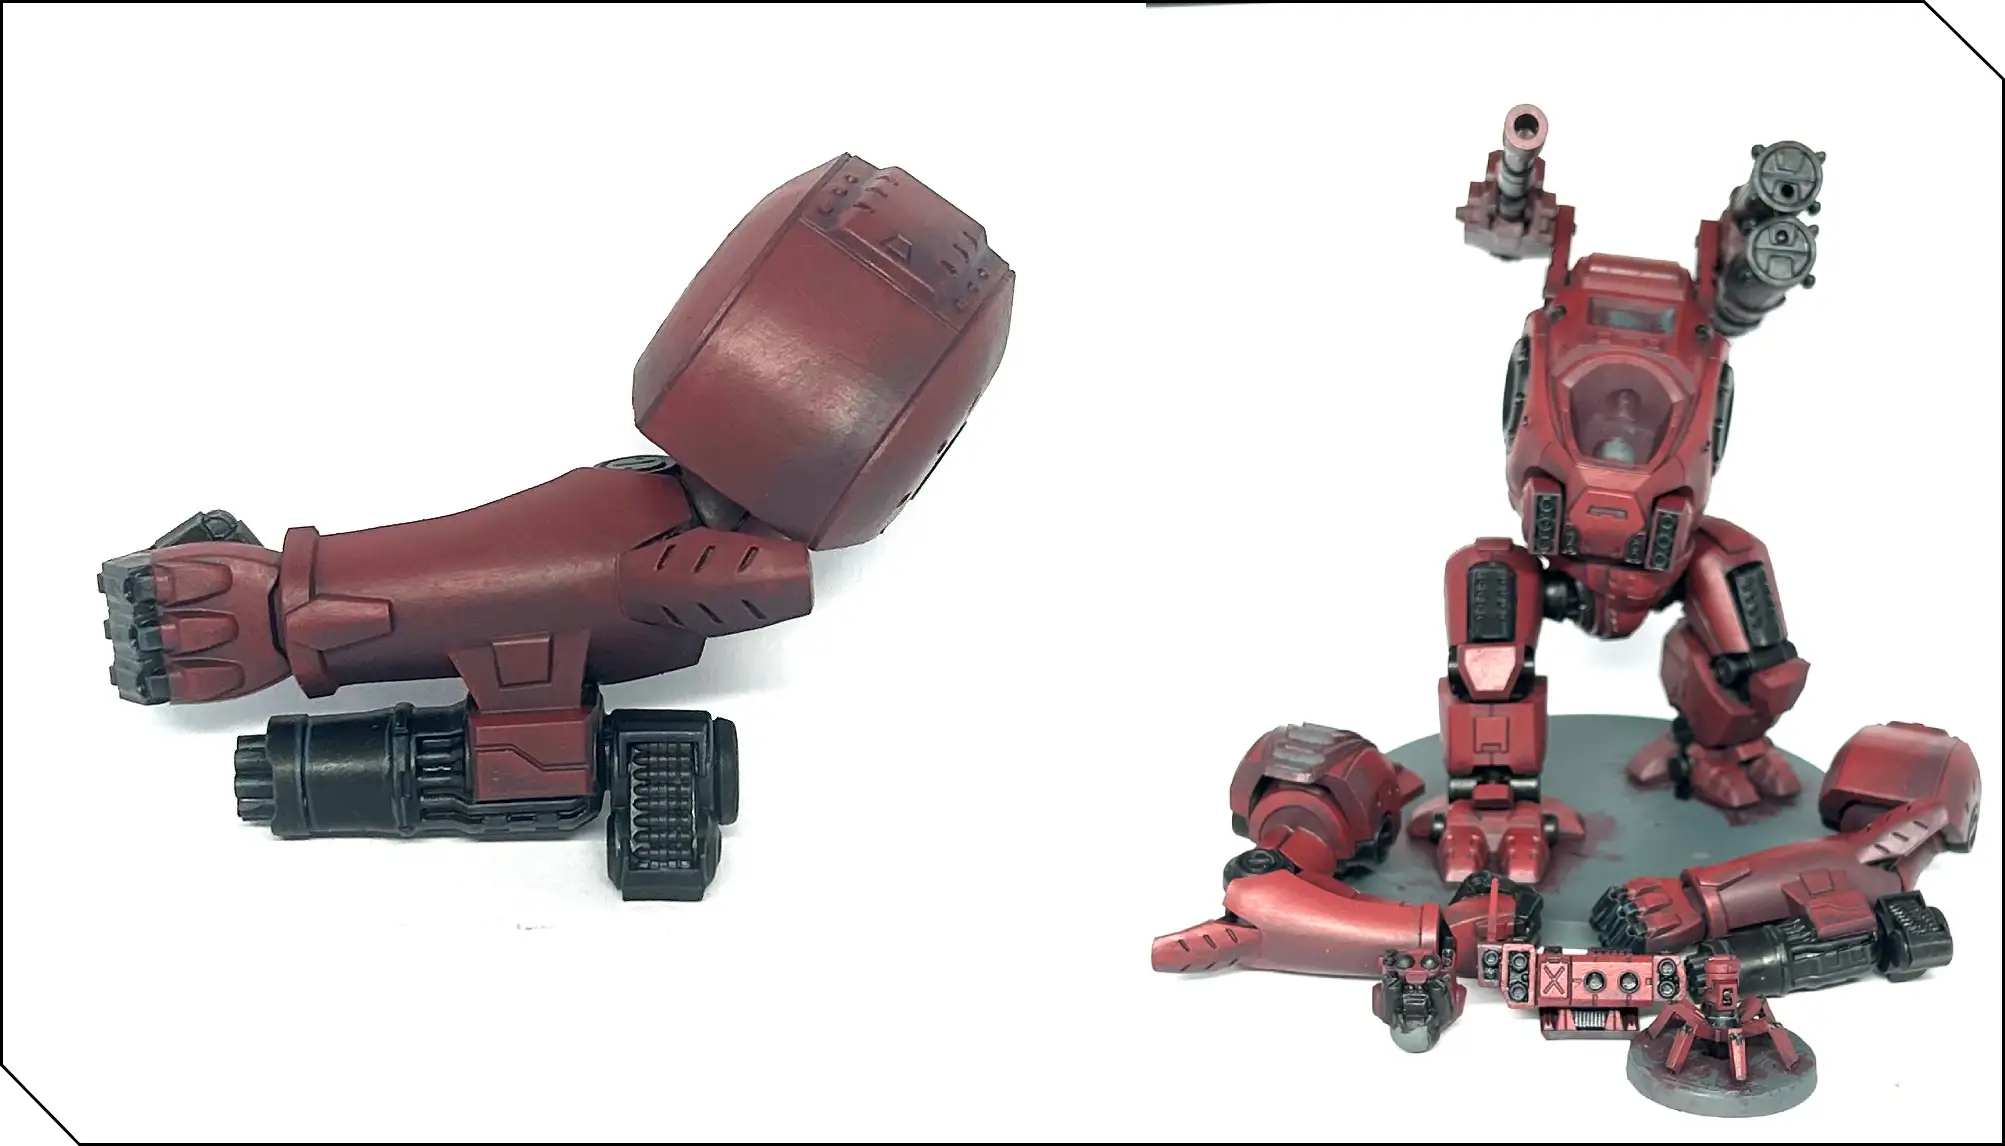
Once the primer has dried, get your medium brush and paint everything with P3 Sanguine Shadow. It’s a good, deep red that will cover in two coats and will form the basis of the scheme. Ensure that you thin the paint a little with water before you paint it on—too thick a coat will create an uneven texture and obscure detail. Patience is key when painting red, so wait until the first layer has dried before applying the second and, if necessary, the third. The biggest mistake that people make with red is trying to rush it. You want good, even coverage all over before moving on.
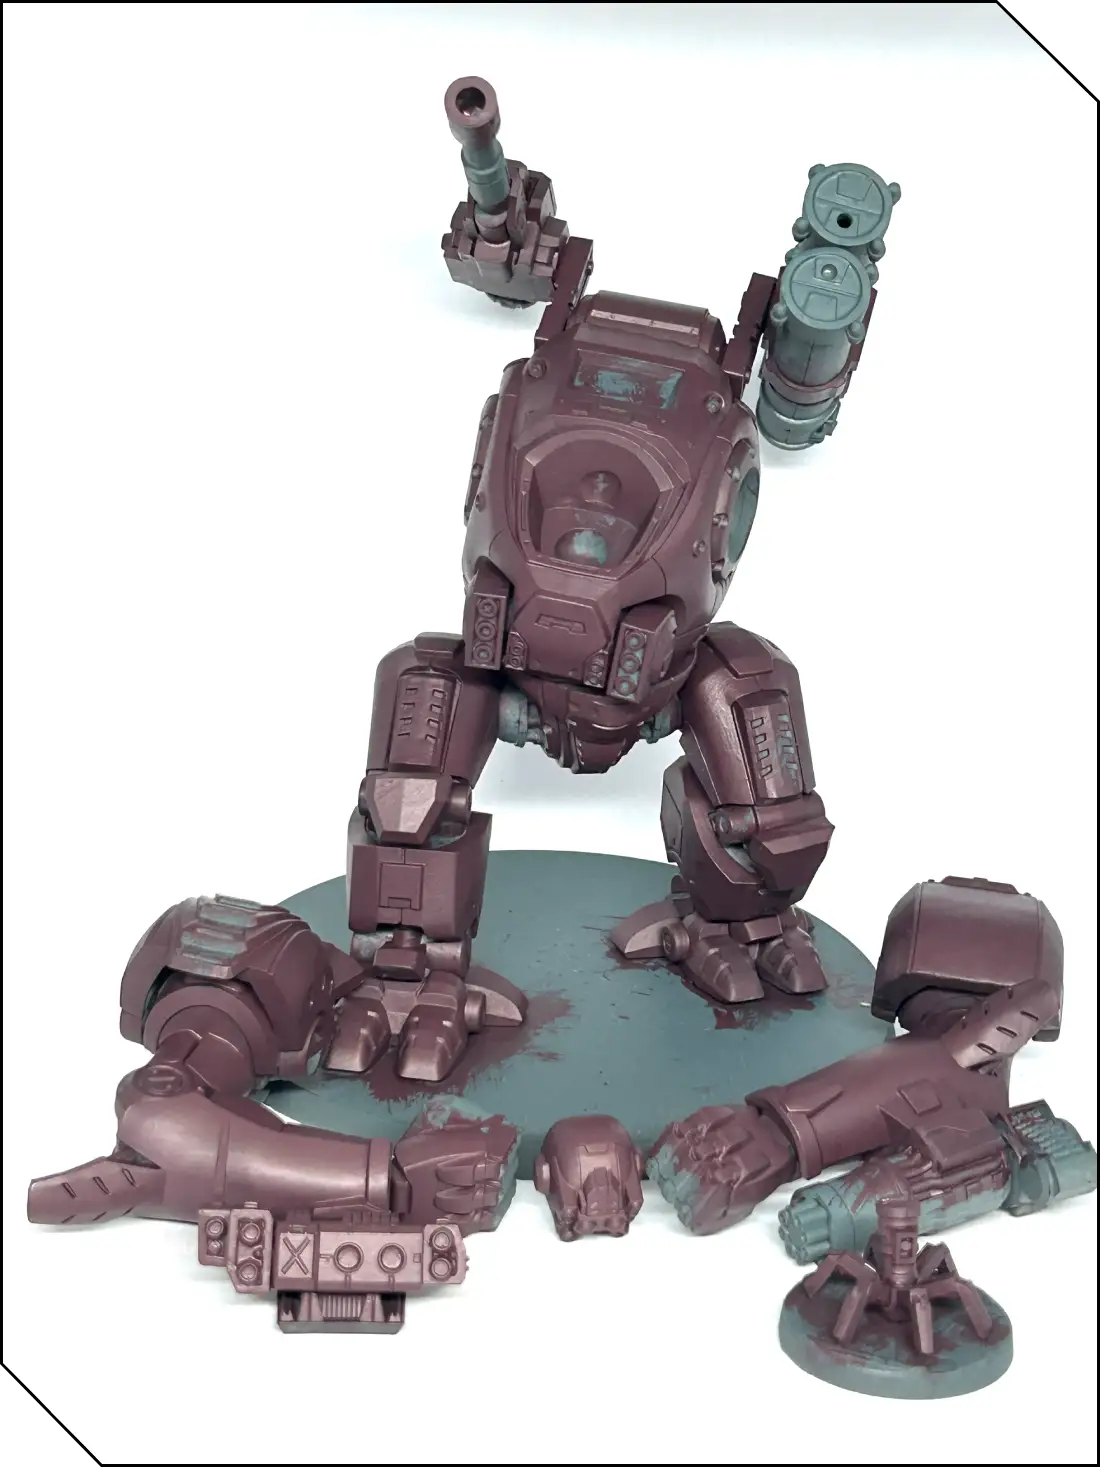
Next, we’re actually going to work on the joints, gun barrels, and other mechanical bits. Using your layer brush, paint P3 Thamar Black on these areas, again thinning and aiming for two coats for good coverage. As many of the joints are in between armor panels, it’s likely you’ll get black on the red you’ve already painted. Don’t worry, however, as that’s why it’s best to do it now rather than once the red is finished. Sanguine Shadow will go over black fairly easily with a few thin coats, so afterwards carefully go back and paint over any mistakes.
Once that’s done, use your detail brush to highlight the edges of the black with P3 Coal Black, and then do the same on the uppermost edges with a 1:1 mix of Coal Black and P3 Underbelly Blue. This is a fairly basic way to give definition to the black areas without spending too much time on them, especially as the main focus here is on getting a striking red.
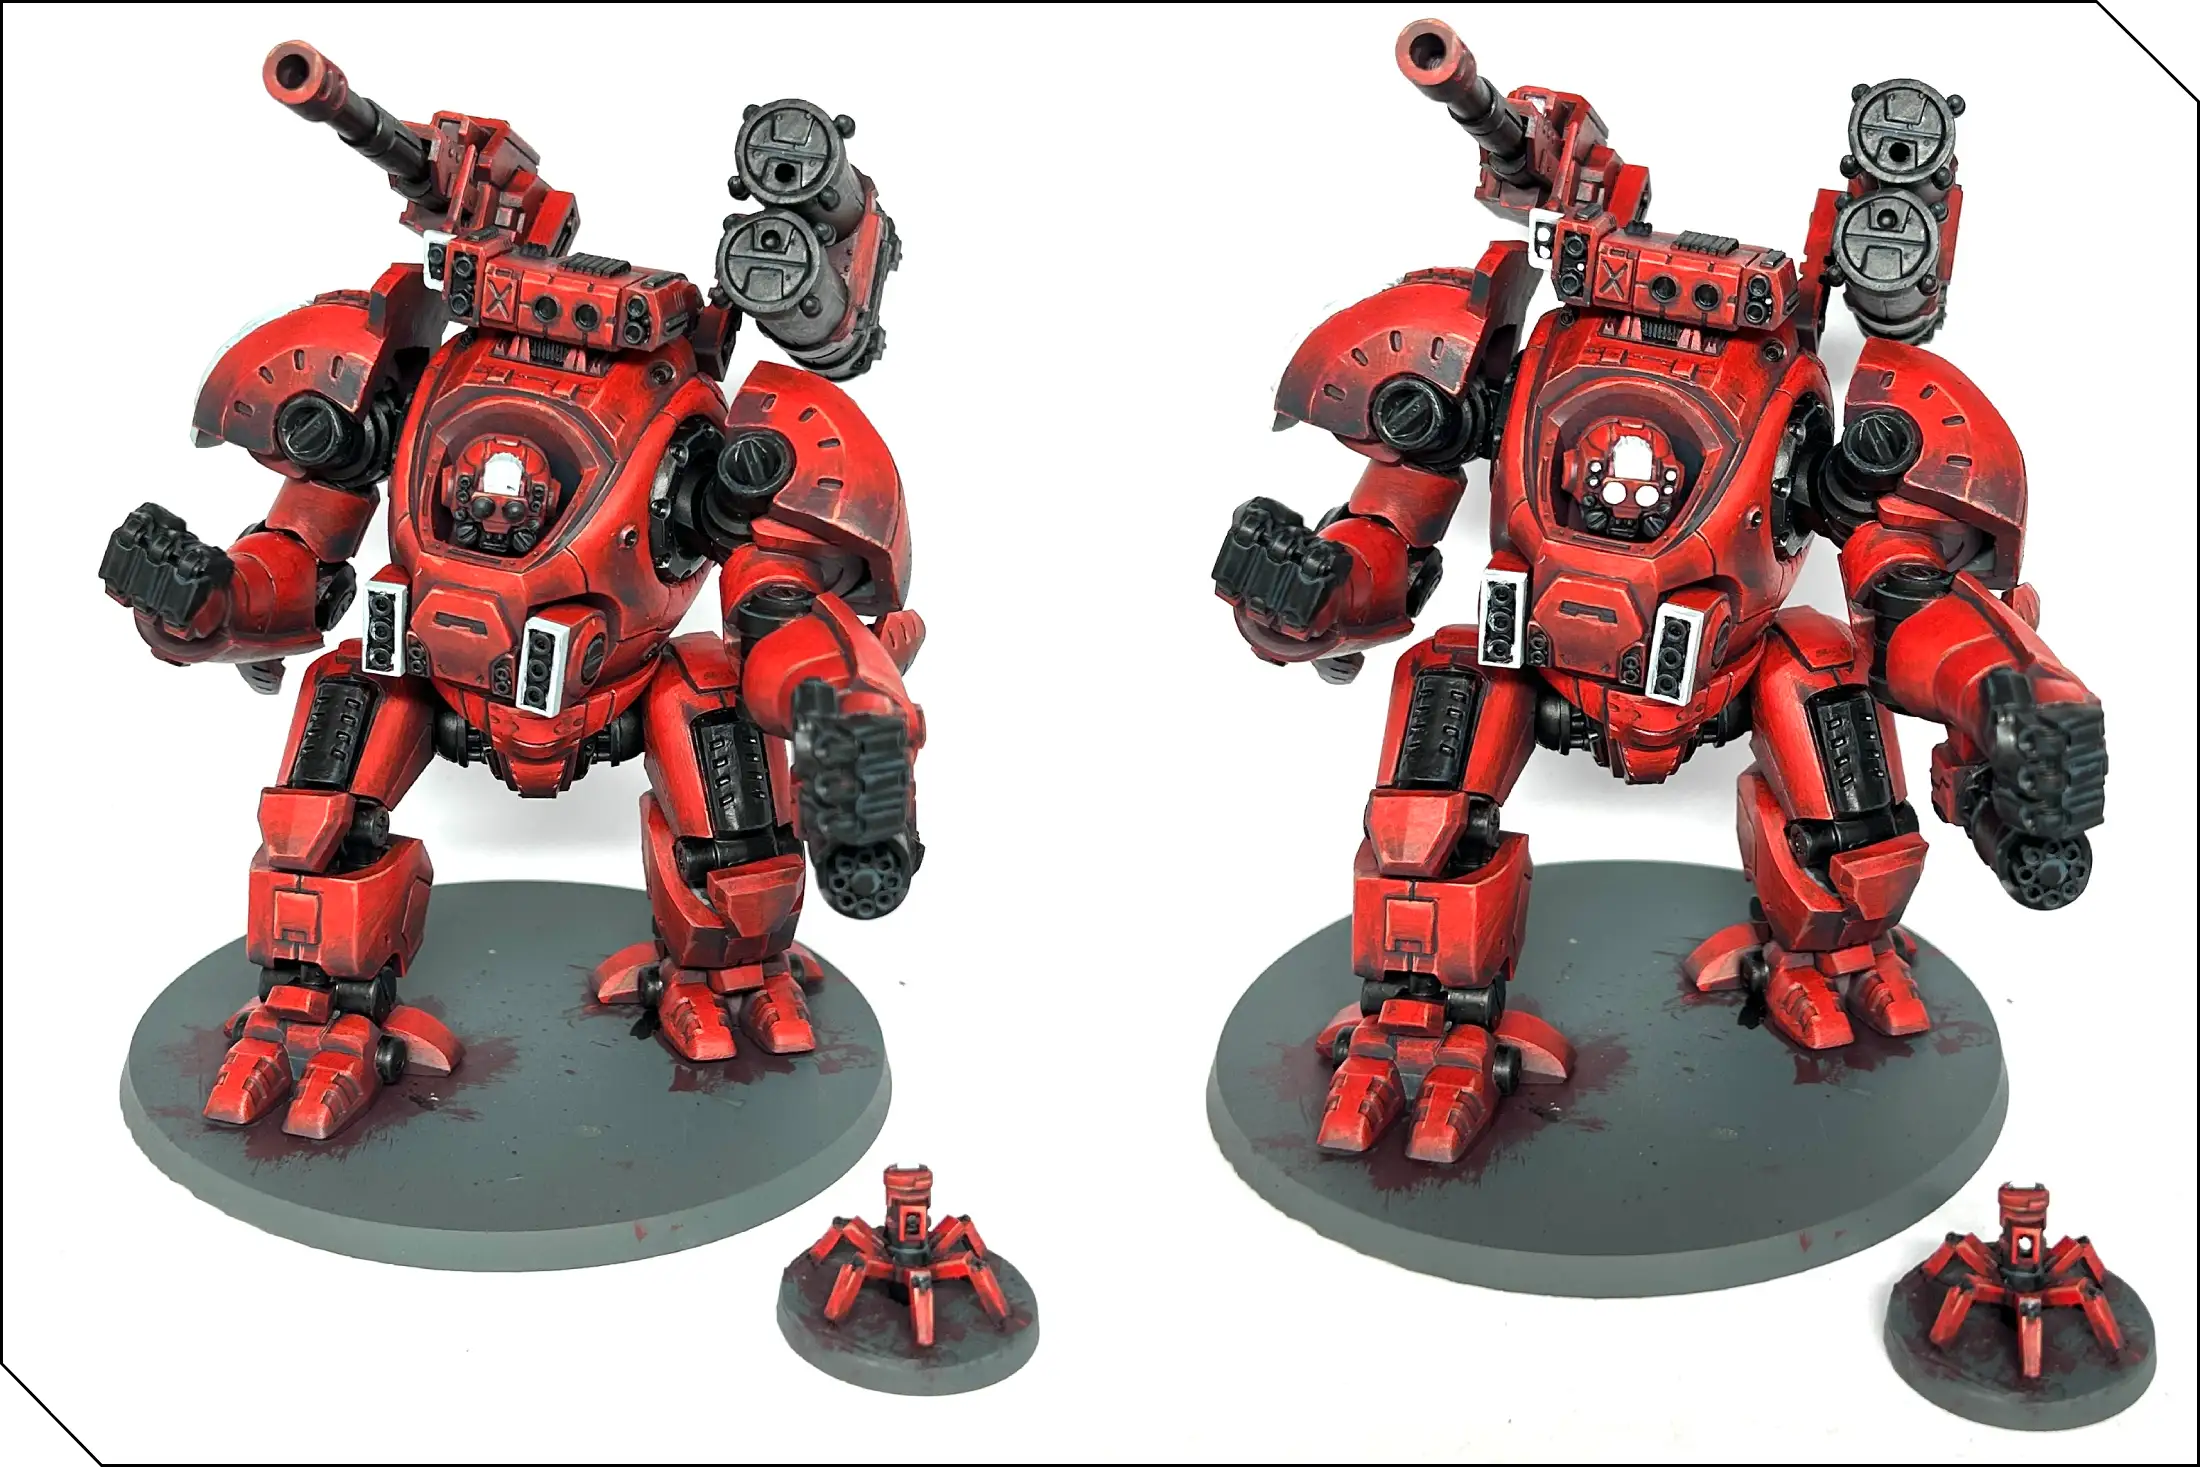
The Red
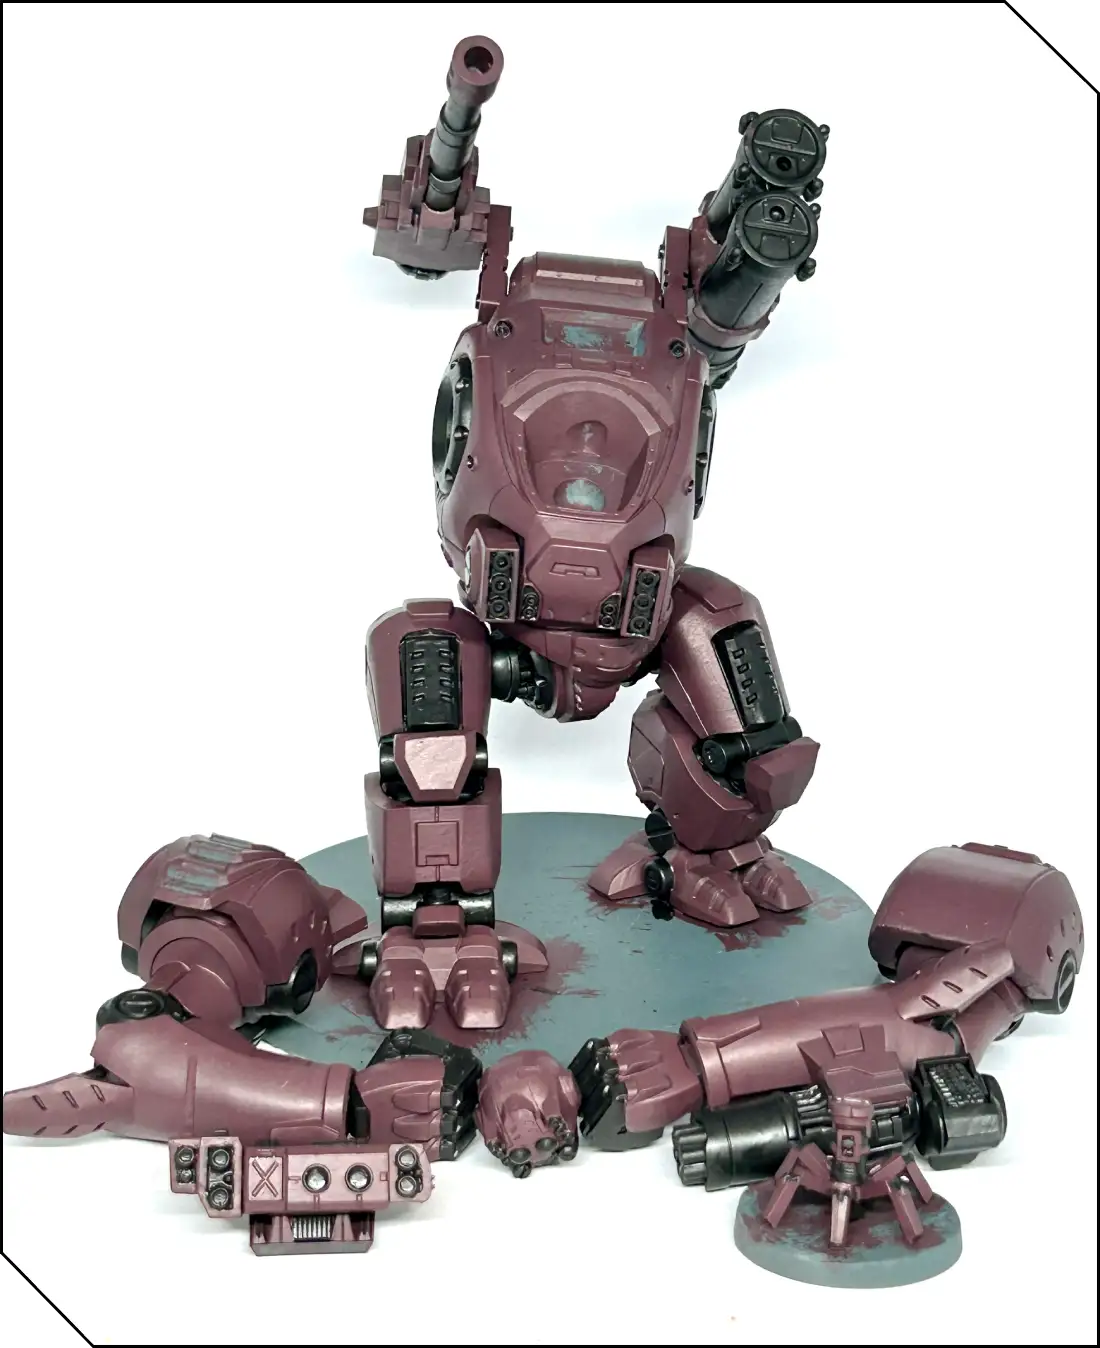
Now that the black is painted, we can go back to working on the red. This is going to be done in stages, creating a gradient that goes up from our Sanguine Shadow base to a final edge highlight of P3 Khardic Flesh.
First, create a 1:1 mix on your palette of Sanguine Shadow and P3 Khador Red. This mix is going to go on the upper half of the red surfaces of the model to begin to emulate light shining on the model, creating the start of a dark-to-light red gradient. Apply in thin layers and take your time; as before, patience is key. It will look blotchy after a couple of coats, but that’s okay; just keep going. After you’ve put down a coat of the red mix, take a different brush, wet it ever so slightly, and gently ‘“feather” the edge of the wet paint so that the distinction between the base layer and the layer you’ve just put down is softened. You can practice a little on your palette first if you’re unsure.
If you’d rather not, or you’re using paints that don’t blend quite the same way, just continue to build up thin layers until the gradient is smooth and even. Take your detail brush and apply a thin highlight of this mix on the edges of the red armor, even on the areas “in shadow” to help define the individual armor pieces. This whole process will take time, and you’ll probably need to mix up a few loads of this mid-tone red before it’s done. Once you’re happy, it’s time for the next step.
We’re now going to repeat this process using pure Khador Red. As a primary red paint, its coverage is quite poor, so again you’ll need to be patient, thinning the paint with water on your palette to a consistency you feel comfortable using. Work the paint up on the upper third of the various armor surfaces now, using thin layers and gentle blends as before. Keep going until you’re happy with it.
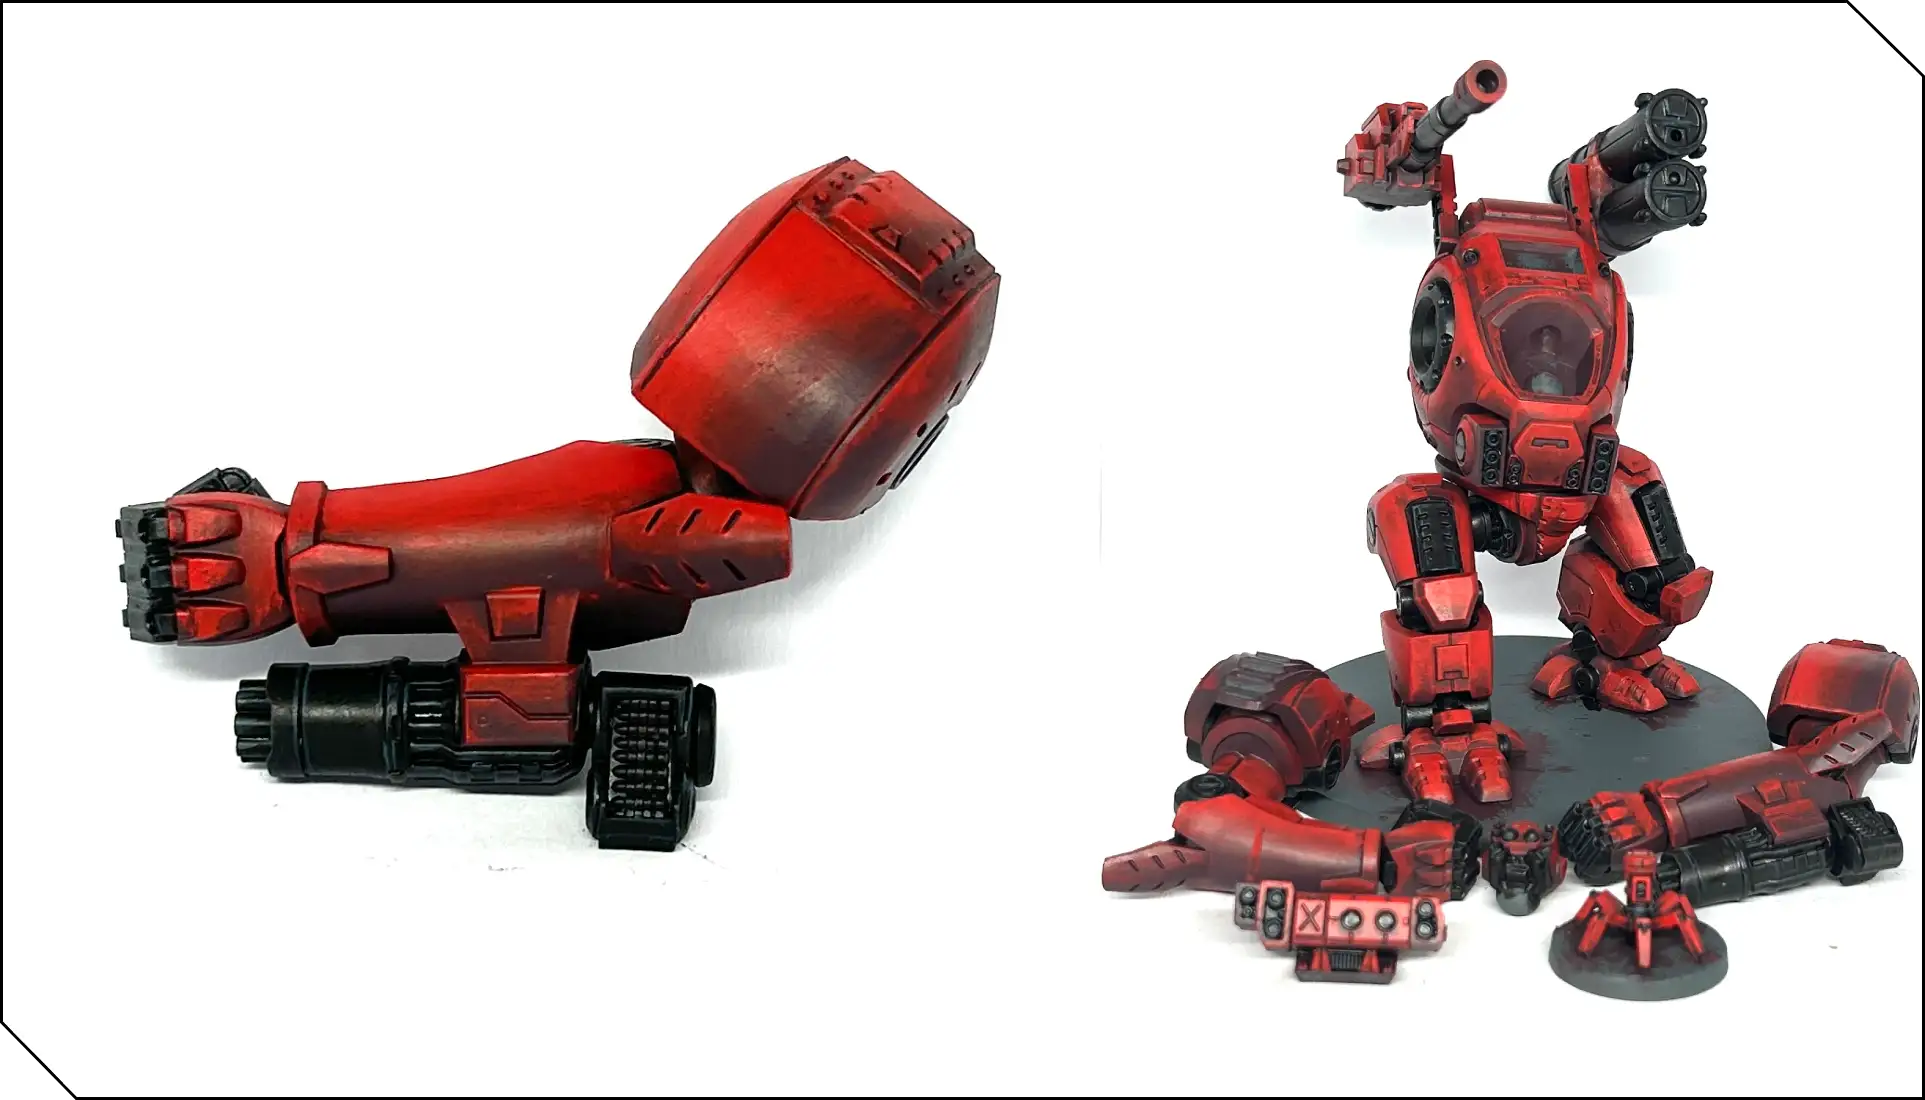
Right now, we have a red gradient that is quite striking, but we can push it a little further. Take thinned Coal Black and with your detail brush carefully paint it into the recesses of armor panels to further define them. Also, you can use this color on the underside of the red surfaces, as an opposite to the Khador Red we used earlier. The green tones in this paint will contrast with the Sanguine Shadow and create the impression of deep shadows on the model. Coal Black has quite good coverage, so resist the urge to try and paint in the shadows in one go and use a couple of thin layers instead.
Once you’ve done that, you can finish assembling the model! The red is nearly done; the last step is to use Khardic Flesh as a thin highlight on the upper edges of the model. Flesh midtones are great for putting final highlights on red, as they’re neither too orange or too pink, so they keep the red “looking red” without desaturating it.
The red is done! It took a while, but it will look fantastic on the table. You could even add further steps if you really want to go all in, creating mixes with different ratios of the various paints we’ve used to create even cleaner, smoother gradients.
Finishing Up
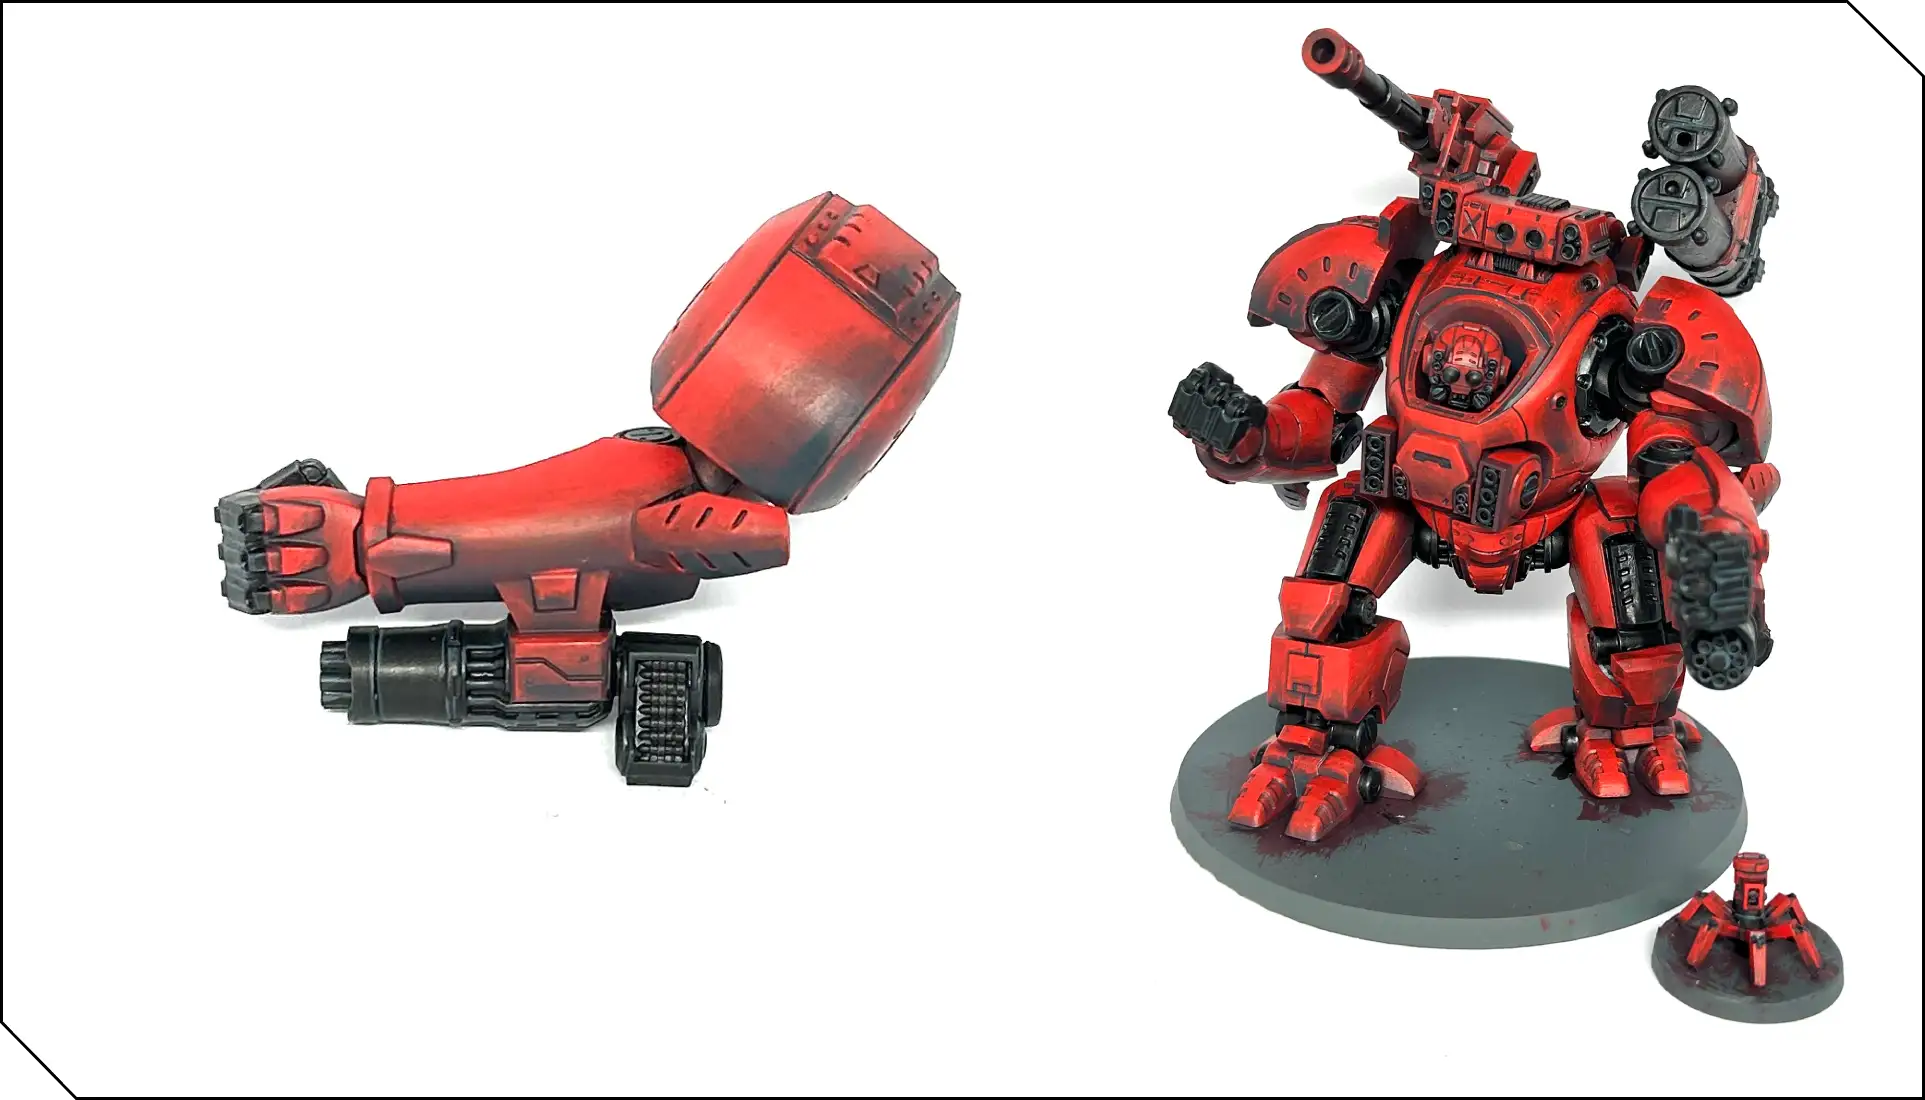
Just a couple more things to do now to finish the model. Use Underbelly Blue on all the areas you want to be white, followed by a layered highlight of P3 Morrow White to finish them off. Also, using Morrow White, paint any lenses and lights on the model.
Next, paint P3 Arcane Blue over the lenses and lights, thinned slightly to let the white underneath show through and create a slight glow effect. Go over the model one more time to carefully tidy up any mistakes and give the base a simple coat of Coal Black. If you want a more detailed way to paint bases, you can check out my earlier tutorial in part one of this series.
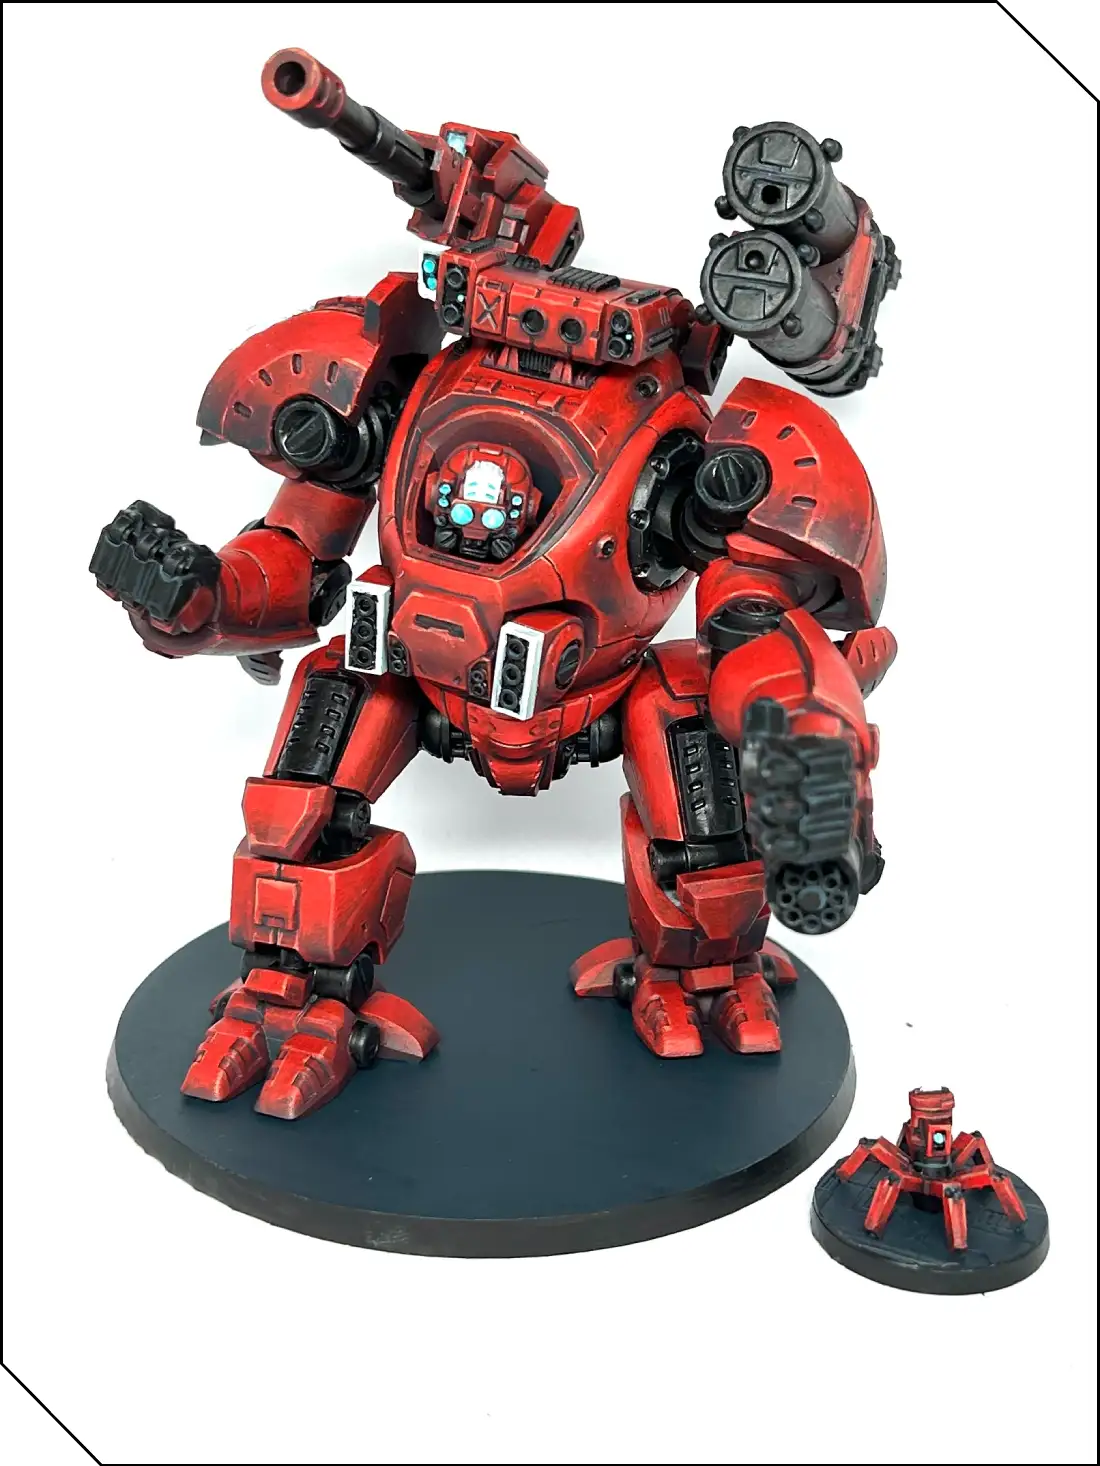
The last step is entirely optional, but given the large flat surfaces on the Onslaught, you might see an opportunity for some freehand work. I’ve chosen to do a stripe, some stenciled digits and a bit of personal “tankpot” branding, but what you draw is up to you. Take your pencil and lightly sketch out your design. Doing it this way helps you figure out how you want the design to fit on the model, and is often more familiar than using a brush to begin with. Plus, if you make errors, you can gently erase them as you would any normal pencil drawing. (Don’t press too hard or you’ll erase some of the paint, too.)
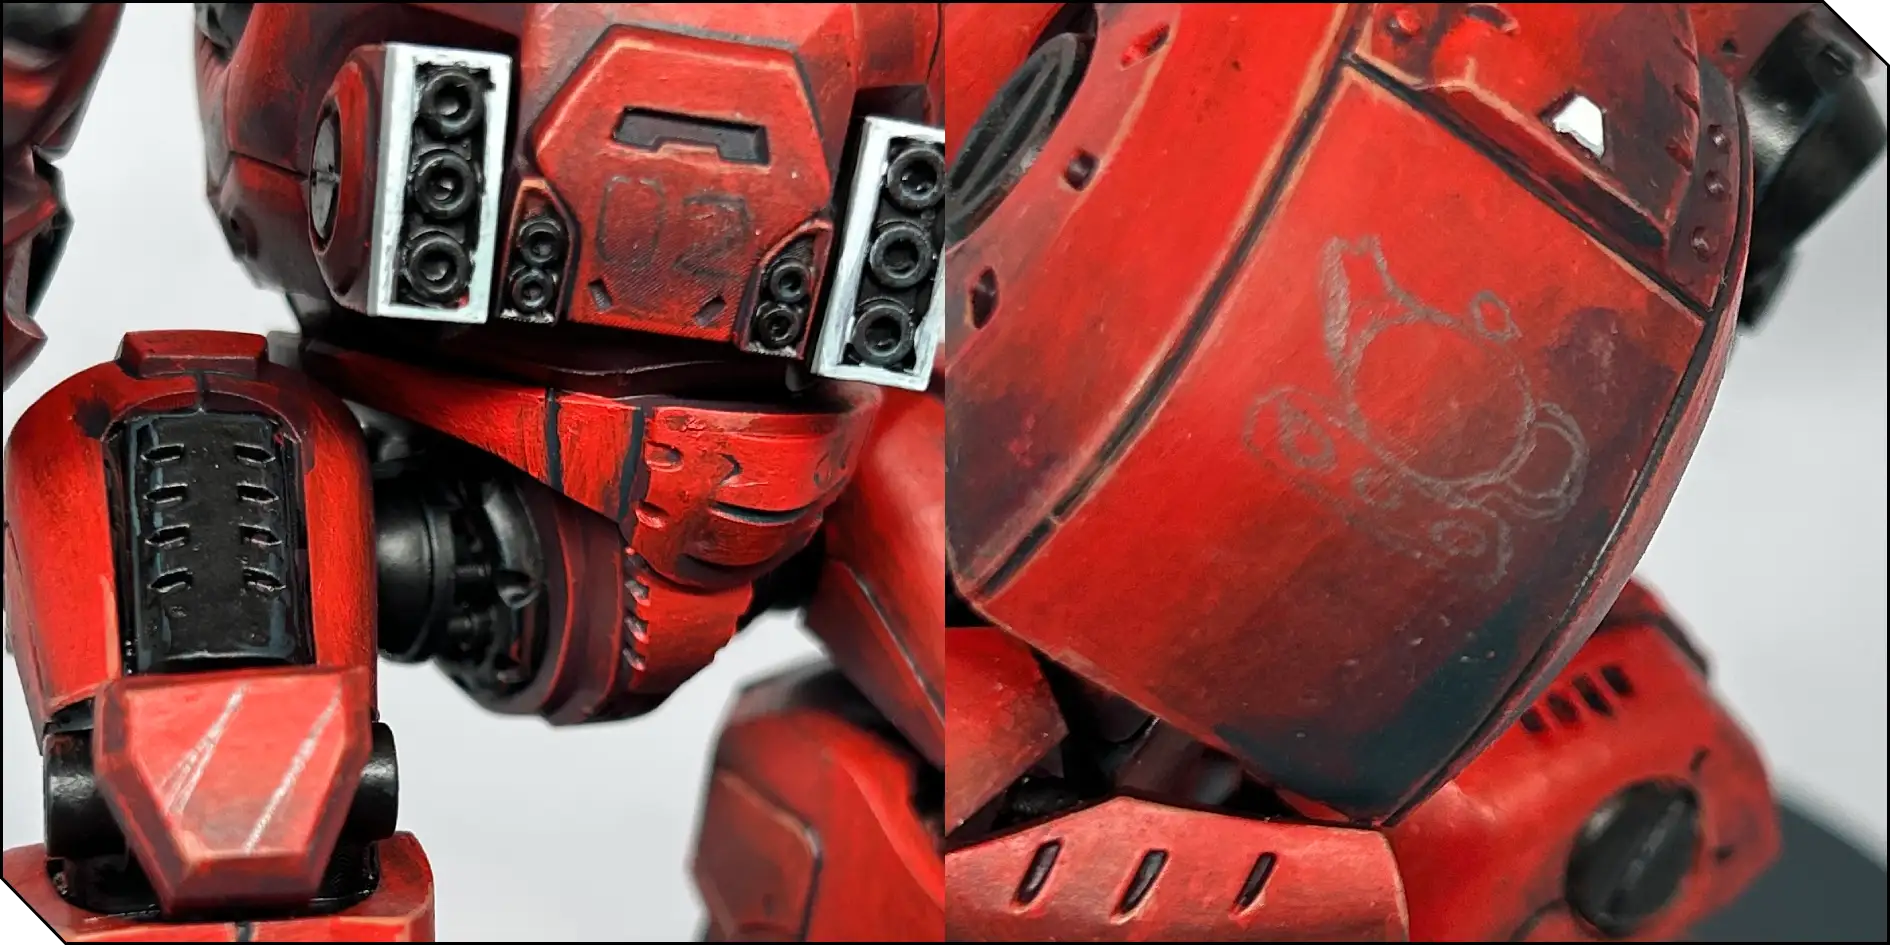
Once you’re happy, you can paint over the pencil lines. I used Underbelly Blue followed by Morrow White. The paint should flow nicely off the brush here, so keep it reasonably thin and use a brush with a good point. Don’t be afraid to allow yourself several coats—the design should be clear and smooth, especially if you want to give the impression it's been painted on by a machine.

And that’s it! Hopefully this will have helped you with a normally tricky color to paint. The main thing to remember is to be patient and build up layers carefully and methodically. Have fun!
Follow Zoe’s awesome painting work on Instagram and Bluesky!


.webp)
.webp)


.webp)


